Reviving grout that has turned black is easier than you think. With the right techniques, your tiles can look brand new. Our guide on How to Clean Grout That Has Turned Black provides simple, effective methods to restore the original brilliance of your grout lines.
From common household items to specialized cleaners, we'll walk you through step-by-step, ensuring a sparkling finish. Say goodbye to dingy grout and hello to a refreshed, vibrant space. Don't let blackened grout dampen your décor – let's bring explore how to clean grout that has turned black and restore the beauty of your tiles shine.
Understanding Black Grout and Its Causes
Black grout refers to the dark discoloration or staining that can occur in the joints between tiles, especially in areas with high moisture levels. This phenomenon is primarily caused by the growth of mold, mildew, or algae within the grout lines. Here are some key causes:
Moisture: Excessive moisture in an area can create a conducive environment for mold and mildew growth. This is especially common in bathrooms, kitchens, or other spaces where water is frequently used.
Inadequate Ventilation: Insufficient ventilation prevents moisture from evaporating properly, creating conditions conducive to the growth of mold and mildew.
Organic Material: When organic matter like dirt, soap scum, or skin cells get trapped in the grout, they can serve as food sources for mold and mildew, allowing them to thrive.
The Impact of Black Grout on the Appearance of Tile Floors
The presence of black grout significantly affects the overall aesthetic of tile floors, potentially diminishing their visual appeal. Here are some notable impacts:
Unsightly Appearance: Black grout creates an unsightly and dirty-looking contrast against lighter-colored tiles, which can be particularly noticeable in high-traffic areas.
Perceived Cleanliness: Even if the tiles themselves are clean, the presence of black grout can give the impression that the entire floor is dirty or poorly maintained.
Design Disruption: It can disrupt the intended design or pattern of the tiles, detracting from the visual harmony of the space.
Common Mistakes that Contribute to Black Grout Formation
Avoiding certain common mistakes can help prevent the formation of black grout:
Improper Sealing: Failing to adequately seal grout lines after installation leaves them susceptible to moisture penetration and the growth of mold and mildew.
Using Harsh Cleaning Products: Some aggressive cleaning agents can strip away protective sealants and damage grout, making it more susceptible to staining and discoloration.
Inadequate Ventilation: In spaces like bathrooms, kitchens, and laundry rooms, poor ventilation can exacerbate moisture buildup, creating an ideal environment for black grout to develop.
Cleaning and Maintenance Tips to Prevent Black Grout
Regular Cleaning Routine:
Frequency: Establish a regular cleaning schedule for your tile floors. This should involve sweeping or vacuuming to remove surface dirt and debris, followed by a thorough mopping.
Mild Cleaners: Use mild, pH-neutral cleaners specifically designed for tile and grout. Avoid harsh chemicals that can strip away sealants and damage grout.
Proper Sealing:
Seal Grout Lines: Apply a quality grout sealer after installation and reapply it as needed (usually every 1-2 years). This creates a protective barrier that helps repel moisture and stains.
Follow Manufacturer's Instructions: Always follow the manufacturer's guidelines for application and reapplication of grout sealers.
Good Ventilation:
Adequate Airflow: Ensure that the area with tiled surfaces has proper ventilation. Use exhaust fans, open windows, or consider installing a dehumidifier, especially in high-moisture areas like bathrooms and kitchens.
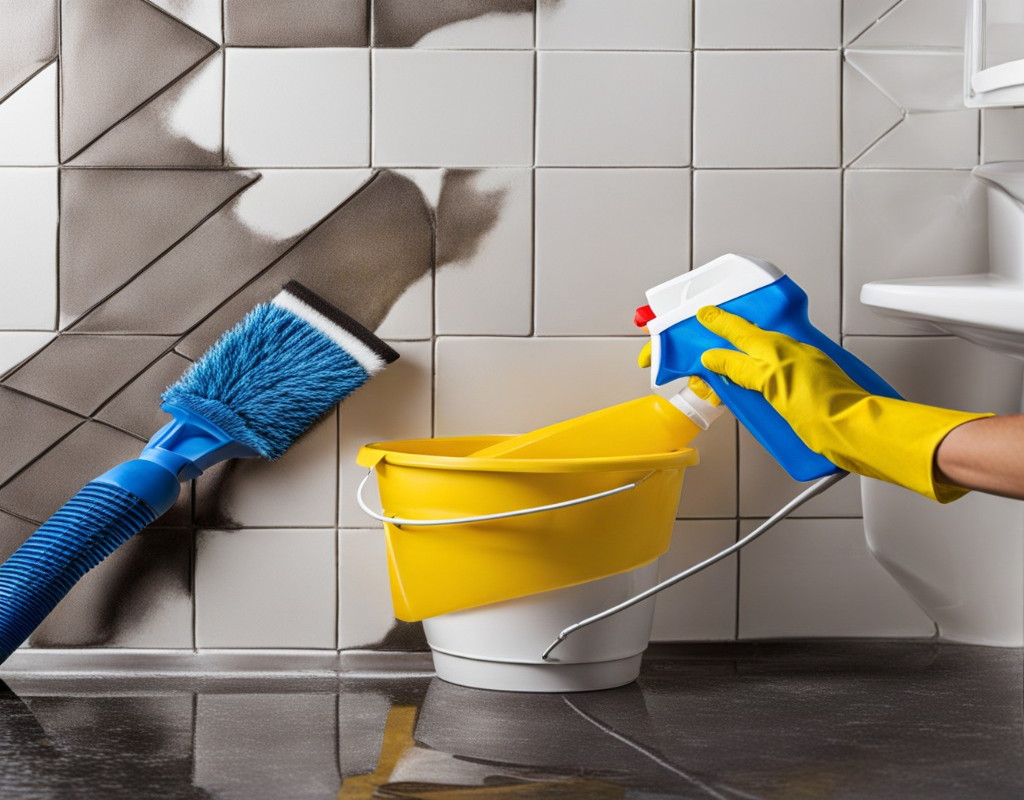
DIY Methods to Remove Black Grout from Tile Floors
Baking Soda and Water Paste:
Mixing: Create a thick paste by combining equal parts baking soda and water.
Scrubbing: Apply the paste to the blackened grout lines and let it sit for about 10-15 minutes. Then, scrub with a stiff brush or an old toothbrush. Rinse thoroughly.
Vinegar and Water Solution:
Dilution: Mix equal parts of water and white vinegar in a spray bottle.
Spraying and Scrubbing: Spray the solution onto the blackened grout and let it sit for a few minutes. Scrub with a brush and rinse thoroughly. Be cautious with this method on natural stone tiles, as vinegar can etch certain types.
Hydrogen Peroxide and Baking Soda:
Mixing: Create a paste using a mixture of baking soda and hydrogen peroxide (in a ratio to form a paste).
Application and Scrubbing: Apply the paste to the blackened grout, let it sit for a while, and then scrub with a brush. Rinse thoroughly.
Professional Solutions for Tackling Stubborn Black Grout
Professional Grout Cleaning Services:
Expertise: Hiring a professional grout cleaning service ensures that the job is done thoroughly and safely, especially if the grout is severely discolored or the tiles are delicate.
Steam Cleaning:
Professionals may use high-pressure steam cleaners designed for grout. The heat and pressure help lift dirt and grime from the grout lines.
Grout Re-coloring or Re-sealing:
Professionals can re-color grout to a lighter shade or re-seal it to provide an added layer of protection against future staining and discoloration.
Precautions and Safety Measures for Black Grout Removal
Ventilation and Respiratory Protection:
Ventilation: Ensure the area is well-ventilated. Open windows and, if possible, use fans to increase airflow. This helps disperse any fumes from cleaning agents.
Respiratory Protection: If using strong chemicals, wear a dust mask or respirator to protect your lungs from inhaling any potentially harmful particles or fumes.
Eye and Skin Protection:
Gloves and Goggles: Wear rubber gloves to protect your skin from harsh chemicals. Additionally, safety goggles or protective eyewear will shield your eyes from splashes or accidental contact with cleaning agents.
Proper Use of Cleaning Agents:
Read Labels: Always carefully read and follow the instructions on the labels of cleaning products. Some chemicals may require dilution or specific application methods.
Test in a Small Area: Before applying any cleaning solution, test it on a small, inconspicuous area to ensure it doesn't cause damage to the tiles or grout.
Long-Term Strategies to Prevent Black Grout from Reoccurring
Regular Cleaning and Maintenance:
Sweep and Vacuum: Routinely remove surface dirt and debris with a broom or vacuum cleaner to prevent it from settling into the grout lines.
Mop with Neutral Cleaners: Clean the tiles and grout regularly using a pH-neutral cleaner. This helps remove any buildup that can lead to black grout over time.
Proper Sealing and Re-sealing:
Initial Sealing: Apply a high-quality grout sealer after installation. This forms a protective barrier against moisture and stains.
Regular Re-sealing: Reapply the grout sealer as recommended by the manufacturer, typically every 1-2 years or as needed. This helps maintain the integrity of the grout.
Good Ventilation and Humidity Control:
Use Exhaust Fans: In areas with high humidity, such as bathrooms and kitchens, use exhaust fans to help reduce moisture levels and prevent conditions favorable to mold and mildew growth.
Dehumidifiers: Consider using a dehumidifier in particularly damp areas to regulate humidity levels.
How to Clean Grout That Has Turned Black, for that we already give you all tensed free methods. By following our expert suggestions during grout removal and implementing these long-term strategies, you can effectively clean black grout and take steps to prevent it from returning. Remember that regular maintenance is key to preserving the cleanliness and appearance of your tiled surfaces.